
Many hard-wired home EV charger installations are reasonably straightforward, but others very difficult. This project fell firmly into the latter category. Discover the challenges, approach, outcome — and the cost.
While a plug-in ‘granny’ (aka Level 1, brick or mobile connector) charger suits some people, these devices are slow. In this case, the EV owner’s granny charger would have taken 40 hours to top up his electric car’s battery from empty. And time can be money; particularly if you’re on a Time of Use (ToU) tariff. Charging through a peak period can really expensive compared to other periods that can be as cheap as free depending on your electricity retailer’s plan.
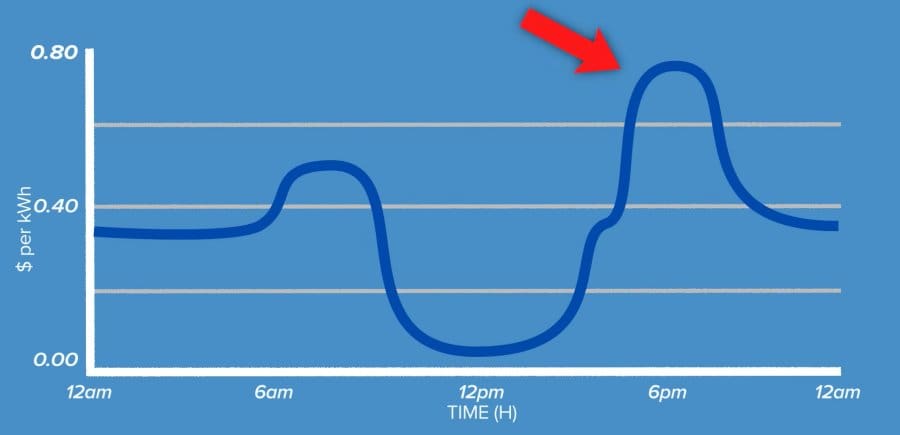
Example of rates for a Time of Use electricity plan
A granny charger can also pull 10 Amps — and in a home with aging wiring (in this case 38 years) when that load is applied for many hours on end, it could result in heat related damage. Having a hard-wired Level 2 charger with dedicated wiring installed to 2025 standards provides peace of mind, in addition to three times the charging speed in this instance.
The Installation Scenario
- The home is within a townhouse development.
- The charger was to be installed in the garage.
- The garage is separated from the home by a backyard covered in pavers.
- The home has solar panels. The EV charger needed to communicate with the inverter when the owner just wanted to charge from the solar panels.
- There’s also a home battery — and what the owner didn’t want is the home battery dumping all it has stored into the EV battery, leaving nothing for use by the home overnight.
- There was a single main breaker board for the entire townhouse development situated away from the owner’s home. Each townhouse had a 40 Amp breaker. A 7-kilowatt (kW) single-phase EV charger will pull 32 amps, leaving only 8 Amps for the rest of the house. Switching the oven on for example would add another 10 Amp load, meaning the breaker would trip.
- The home’s own switchboard was inside rather than outside.
The Chosen Charger
The owner already had a SolarEdge inverter and SolarEdge home battery, so a SolarEdge EV charger would be a natural choice as staying within that company’s ecosystem should make installation and operation simpler. The SolarEdge device offered most of the features the owner wanted including dynamic load management, solar smart charging and the ability to prevent the home battery from emptying into the EV.
But a really important feature was missing — OCPP support. OCPP stands for Open Charge Point Protocol. This is an independent standard allowing third-party services to communicate with devices supporting it.
The owner uses an electricity retailer called Amber Electric that connects customers directly to the wholesale electricity market; providing electricity at the same price Amber (and other retailers) pay. Amber customers just pay a membership fee of $22 a month. As Amber’s electricity prices and feed-in tariff rates vary throughout the day (sometimes very often and wildly), the owner wanted Amber to control his EV charging so he only charges when the price is really cheap or free. That required the charger having OCPP support.
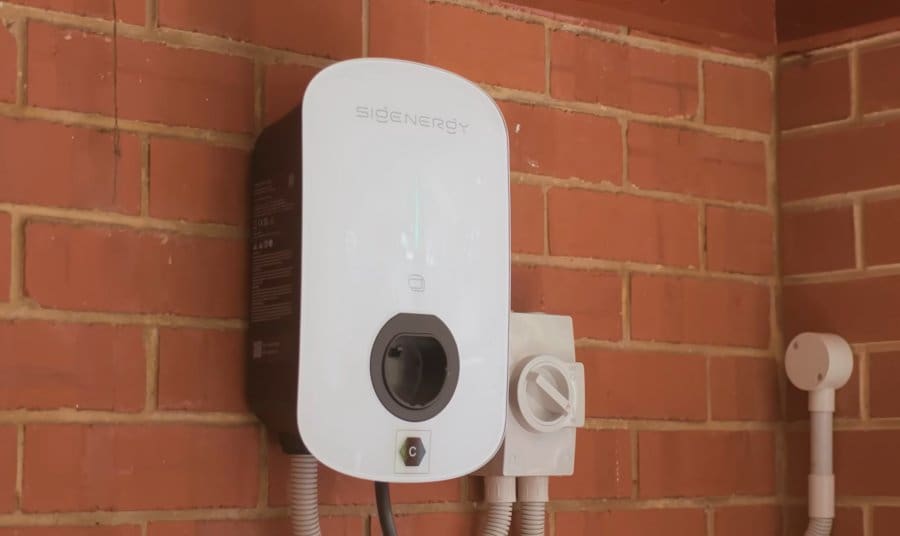
After research, he decided to go with the AC EV charger from SigEnergy, which along with other features he desired, reportedly had a really good OCPP implementation.
With the charger selected and a plan for how the installation would happen, Adelaide installer DQ Electrical got to work.
Installing And Commissioning
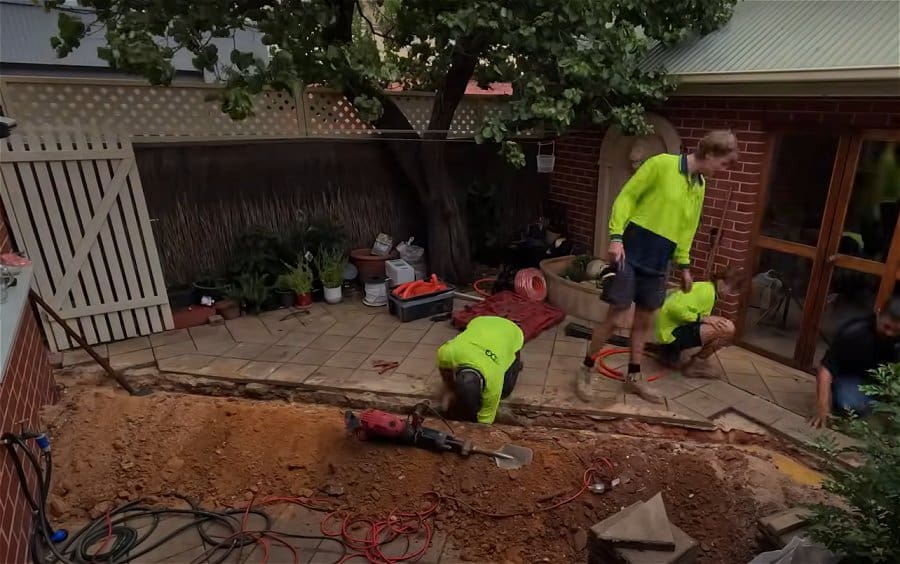
As mentioned, the yard between the house and the garage was paved. The easiest solution would have been stringing conduit along a fence, a couple of walls and down the side of the house. Then the cabling would enter the house through the brick wall, through the first-floor ceiling and into the internal switchboard – which was another complication given the switchboard of most homes is situated outside.
But rather than putting up conduit along the fence and walls all the way, the tidier approach was to go underground for much of the run. This involved trenching 600 mm deep for the power cable and a data cable that would accompany it.
The data cable was necessary for the EV charger’s dynamic load management features, whereby a sensor installed in the switchboard inside the home measures the amount of current coming into the house.
The sensor communicates with the EV charger via the data cable. The EV charger subtracts the Amps coming into the house from 40 (the breaker limit) and calculates how many it has to play with for the EV. For example, if the house is using 15 Amps, the charger knows it has 25 Amps wiggle room and it sets that as the maximum current. As electricity usage inside the house increases or decreases, the dynamic load management turns the current up or down to suit.
After the necessary digging, drilling, fiddling and a few mishaps, the unit was in and tested. Dynamic load balancing testing was done by turning off the solar and battery and turning on appliances in the house while charging. Success.

Testing dynamic load balancing
Integration With Solar And Battery System
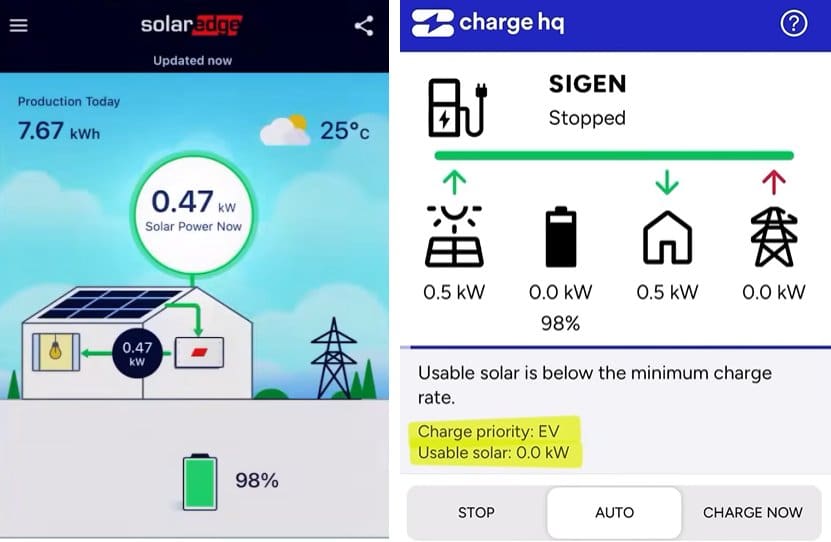
The final part of commissioning involved getting the EV charger talking to the solar and battery system, and that meant another third-party app called Charge HQ.
While connecting the inverter and battery to Charge HQ was easy, connecting the EV charger wasn’t — it required help from Sigenergy behind the scenes.
And that’s when some further problems began.
The EV charger was refusing to charge when it was in solar-only mode, which was because Charge HQ was fighting the control signal sent from the energy retailer Amber. When Amber signals wholesale electricity prices are zero or negative, this means Amber customers pay if they export solar energy. To prevent this, Amber was throttling the solar to what the house was using and nothing more, so Charge HQ couldn’t see any surplus solar energy and refused to play ball.
The good news is Charge HQ and Amber are both owned by the same company, and they are working on the issue to handle this specific situation.
That’s the price of early adoption. And speaking of price …
What This Project Cost
The Sigenergy EV Charger retails for around $1,200 and a standard installation costs an additional $1,000 – $1,500, which includes running cables and potentially some minor adjustments or upgrades to a switchboard.
But this wasn’t a standard installation. This project cost around $5,000 all up, with the underground cabling representing approximately $1,500 to $2,000 of the total cost.
If you’re considering a hard-wired home EV charger, SolarQuotes founder Finn Peacock’s advice is to have a good think about your needs (such as solar smart charging and dynamic load balancing) and the potential challenges of your premises.
If you also have solar panels, a battery and a limited electrical supply, you’re better off going to a specialist for advice, supply and installation rather than buying a charger online and getting a sparkie to install it; then crossing your fingers and hoping for the best that it all plays together nicely. Having the installer supply the unit can also make life easier if there’s a warranty claim or other hardware issues down the track.
Learn more in Finn’s comprehensive home EV charging guide, and if you’re looking for a good installer, SolarQuotes can help there too.
 RSS - Posts


Its a pity he did not go for a bi-directional charger. The extra cost would have been worth it. But it is difficult to add a Bi to a disparate system.
One way it might be possible to add a Bi-directional charger to a disparate system is to control the system with Home Assistant (HA is an Open-source system that can read Inverters, etc & can control OCPP EV chargers). The problem for a ´normal´ user is there needs to be some manipulation of the system to fit everything together. I feel this would be a market an enterprising group could get into: firstly getting everything going, then on-going remote maintenance. In the future, Ai will fill some of these gaps, & development is underway.
As this customer found, it is difficult to get everything talking together, & issues such as systems fighting each other are common. Also, I feel non-OCPP permanent wired chargers should be banned. There will need to be external control available for high demand devices such as EV chargers.
A really good post of the challenges of EV Charger installation. Thanks for sharing Finn. Being an engineer myself, I enjoyed reading it.
Thanks
I have solar, battery, EV and 3-phase ZJ Beny OCCP charger.
I’m with Amber and ChargeHQ.
I’ve had success with
ChargeHQ App -> Settings -> Solar Tracking -> Battery Priority Charge Limit = 50%
The EV charging starts late morning and goes up/down in large steps.
The house battery charges using the triangle-shaped regions between solar production and house+EV use.
Everyone’s experience will be different!
We’re just about to get solar and battery. Although we don’t have an EV, we are thinking of one soon and thought it would be good to add a charger to the installation. After lots of back and forth, we’ve decided not to.
– we’ve got three-phase, so going for a serious charger looks to make sense
– but that means a new three-phase circuit added to the switchboard $
– which probably means a sub-board, because the existing one is just a bit small $
– the garage is 10 metres from the house, so trenching $
– previous work has shown trenching is really tricky in our “soil” $
– power and comms in that trench $
– a new sub-board in the garage, so other things could potentially use that sweet 3-phase $
– and the charger itself $
– and the installation of the charger $
For us, the charger was going to be just too expensive to justify.
We may have the luxury of a separate solar system for the garage, just for the EV, in the future.
Have you considered a 1-phase 7 kW wired charger instead of a 3-phase 11 kW wired charger? Might be cheaper and still better than a plugin charger.
If you do trench between buildings, a colleague recommended buring cheap 90mm stormwater pipe – that will allow multiple separate sub-conduits to be installed/changed over time. Easy to later add e.g. solar, battery, Ethernet, or security wiring.
Yeah, we considered lots of options.
We weren’t originally thinking of a charger: it just seemed to “make sense” to have one installed when we had an electrician on site, pulling apart the switchboard to install the solar and battery. At one stage we were even thinking of putting the battery and inverter in the garage, so the trench would already be needed. With that mindset, it made most sense to go for a 3-phase charger.
But the extra cost really wasn’t worth it, at least not at this stage. By the time we get an EV, things will have changed anyway.
It is possible the existing wiring would support a 7 kW single phase charger.
One annoying thing is that when we got the garage built (15ish years ago), we turned down the idea of having 3-phase run to it because we couldn’t see the need. And there is a comms conduit to the garage, but annoyingly they filled it with “alarm” cable (which is now wedged tight) rather than UTP, so it has never been used.
Hindsight is a valuable thing!
Or even a 7kw charger throttled down to say 16 or 20A which will reduce the charging time compared to a granny charger but not pull such a large current that existing wiring may not handle. And lower currents means less voltage drop and therefore more power is going into the car rather than lost as heat over a long thin wiring run.
That is an interesting idea.
I take it that the charger does the the throttling?
Are all chargers able to do that: be “told” to draw a limited number of kilowatts?
It is good to think about whether or not a faster charger is needed- in most cases, a 10A or 15A outlet is sufficient. Electric car owners don’t wait until the battery is (nearly) empty before charging (as was common with a petrol tank), they charge when they get home. Taking a national average of 14,000 km, and the car in use for only 200 days per year, gives a typical 70km per day. With a vehicle efficiency of, say, 5km per kWh, the battery would need 14kWh, which takes just over 6 hours with a 2.3kW “granny” charger. Of course, there will be days when a longer journey is done, and that’s what the publicly available fast chargers are for.
We’ve been charging BEVs this way for 8 years now, usually throttling down the charger to take 6A from the mains, with no problems.
I like the way you are thinking! Any EV we get would mostly be an electric shopping cart, doing short though frequent trips around town.
Is “throttling” a common feature on chargers, or did you buy one with that in mind?
I don’t think we chose the charger because of the adjustable current feature, but we do find it useful on cloudy days when solar power is limited. Its portability also has uses occasionally, e.g. when staying overnight at a cabin site.
I understand the desire for OCPP support so they can use Amber. However with solar, home battery and now the EV I wonder how often they will really benefit from Amber’s dynamic pricing.
Might have been easier to just go with the SolarEdge charger that integrates nicely with the inverter and battery.
Sungrow have just released their ev charger 1 and 3 phase. It comes with i Home smart management system. Word is cost around $900. Does anyone have more info? Also Sungrow offering cash back on old Sungrow inverter if you are converting to hybrid and battery. I’ve heard the cash back on a 5kw 1 phase is $1000. Solar Quotes do you know anything about this?
Love to know more about this too, I have a sungrow hybrid system with battery and looking to add an ev charger. I’m also on Amber and definitely the issue highlighted here around curtailment is one of my concerns, not sure if simply using the sungrow EV charger works around that issue or if there is more to it.